

- Connect your computer to the wired EOAS network or EOS VPN if on WiFi. The EOS VPN is accessed using UBC's AnyConnect with your CWLusername.eos and CWL password. If you do not have access to the EOS VPN, please submit a helpdesk ticket to helpdesk@eoas.ubc.ca for access.
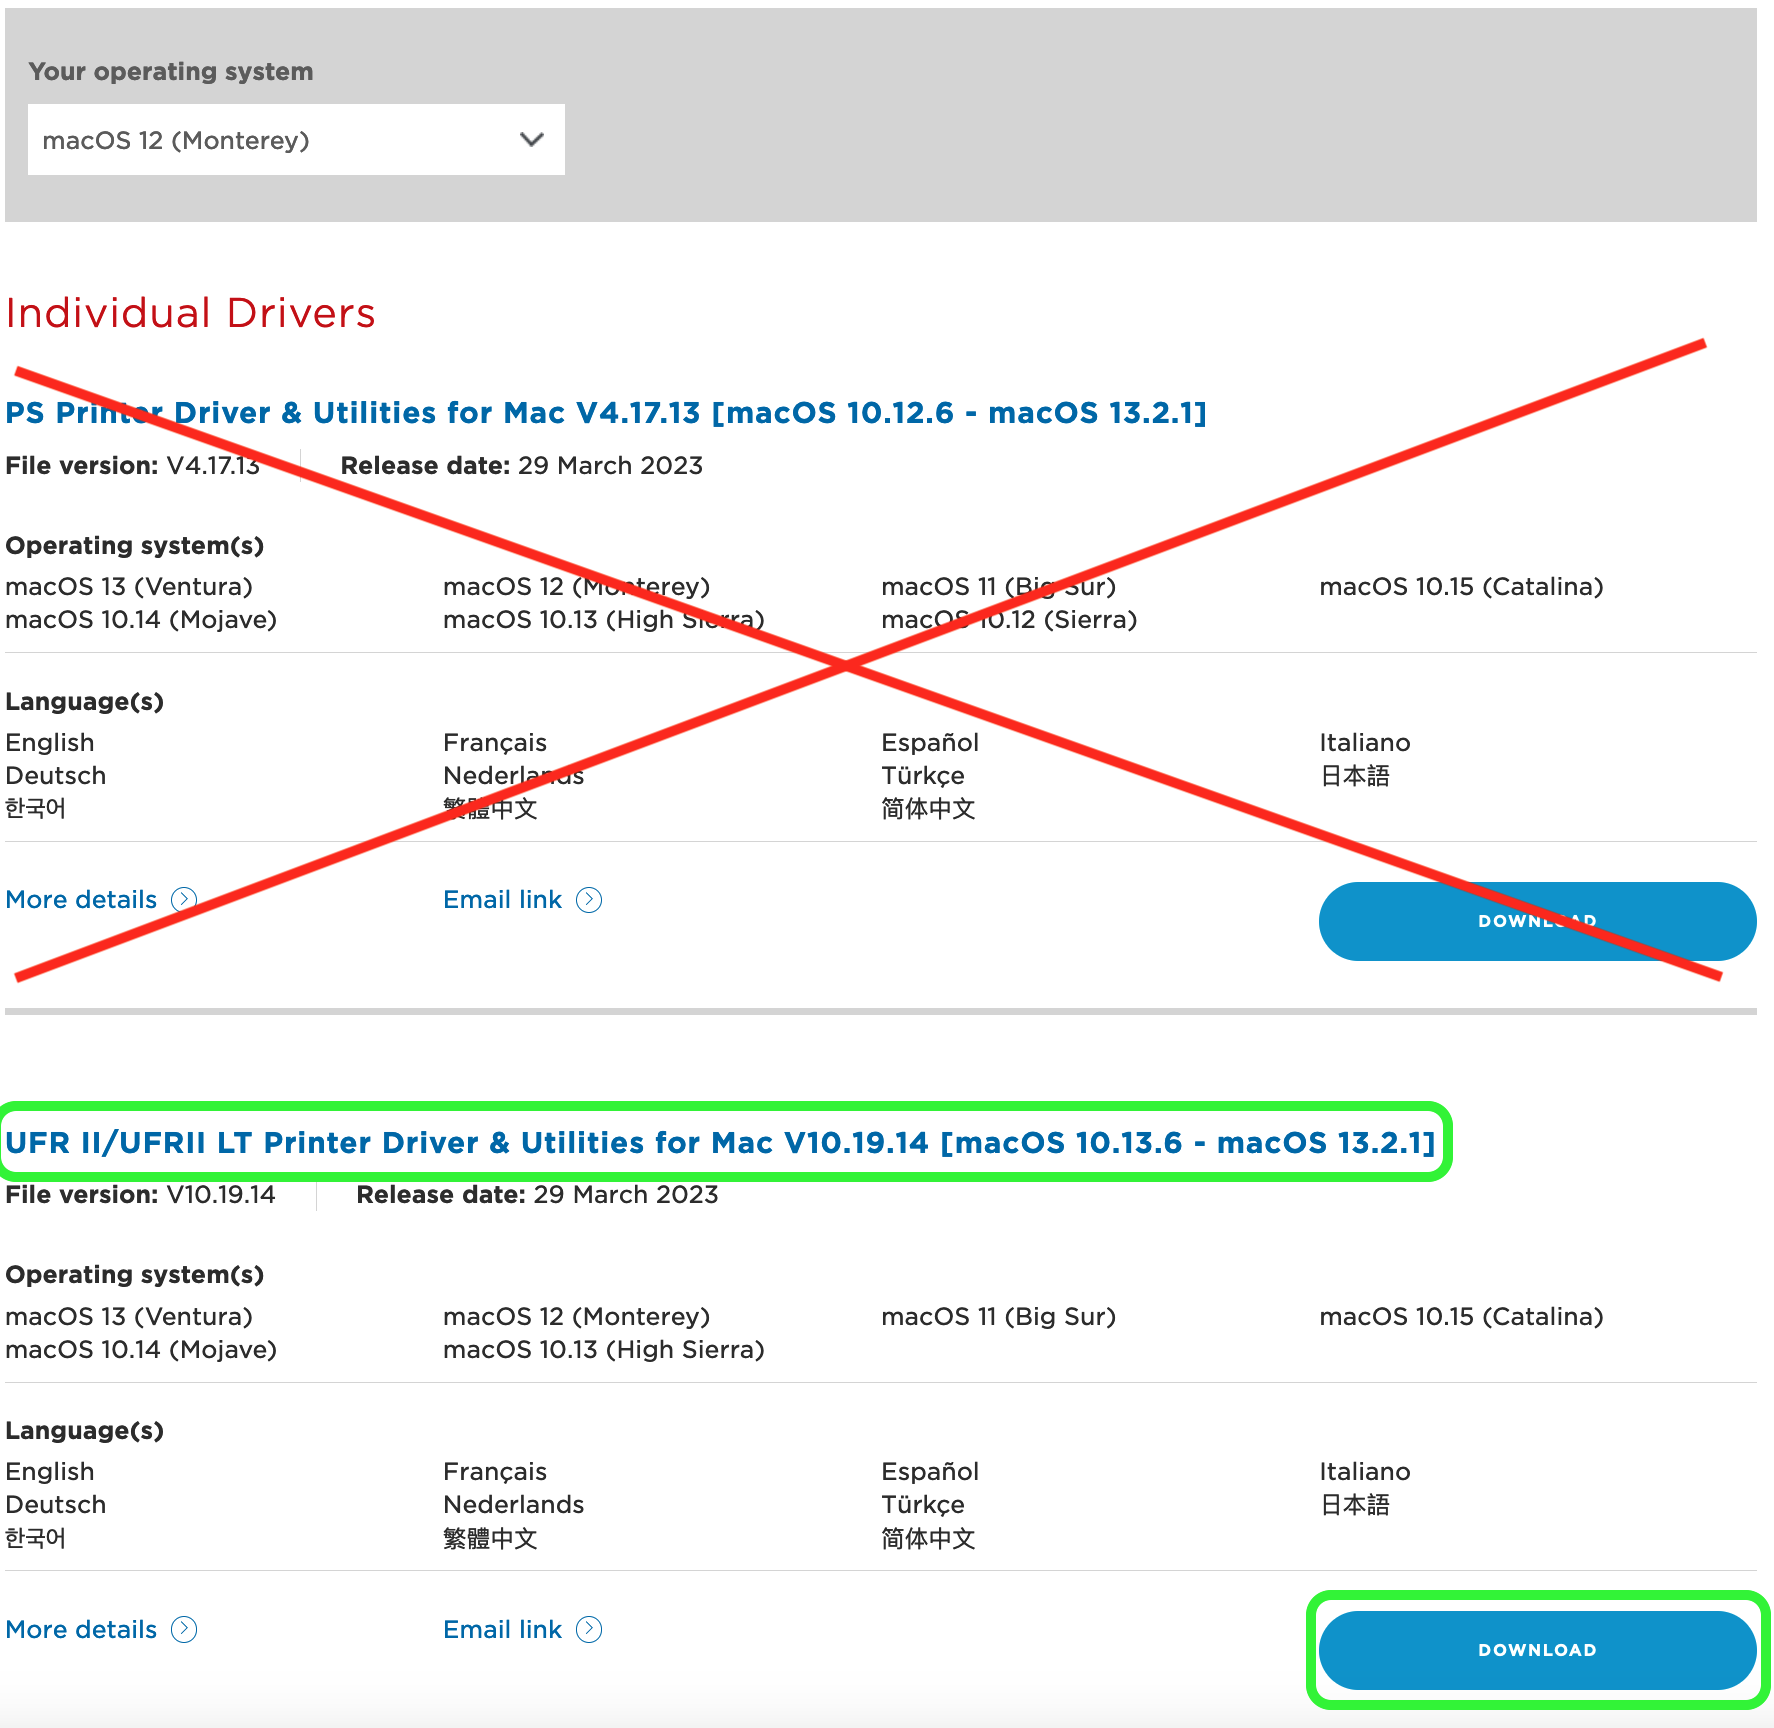
- Download the UFR II drivers for your macOS version:
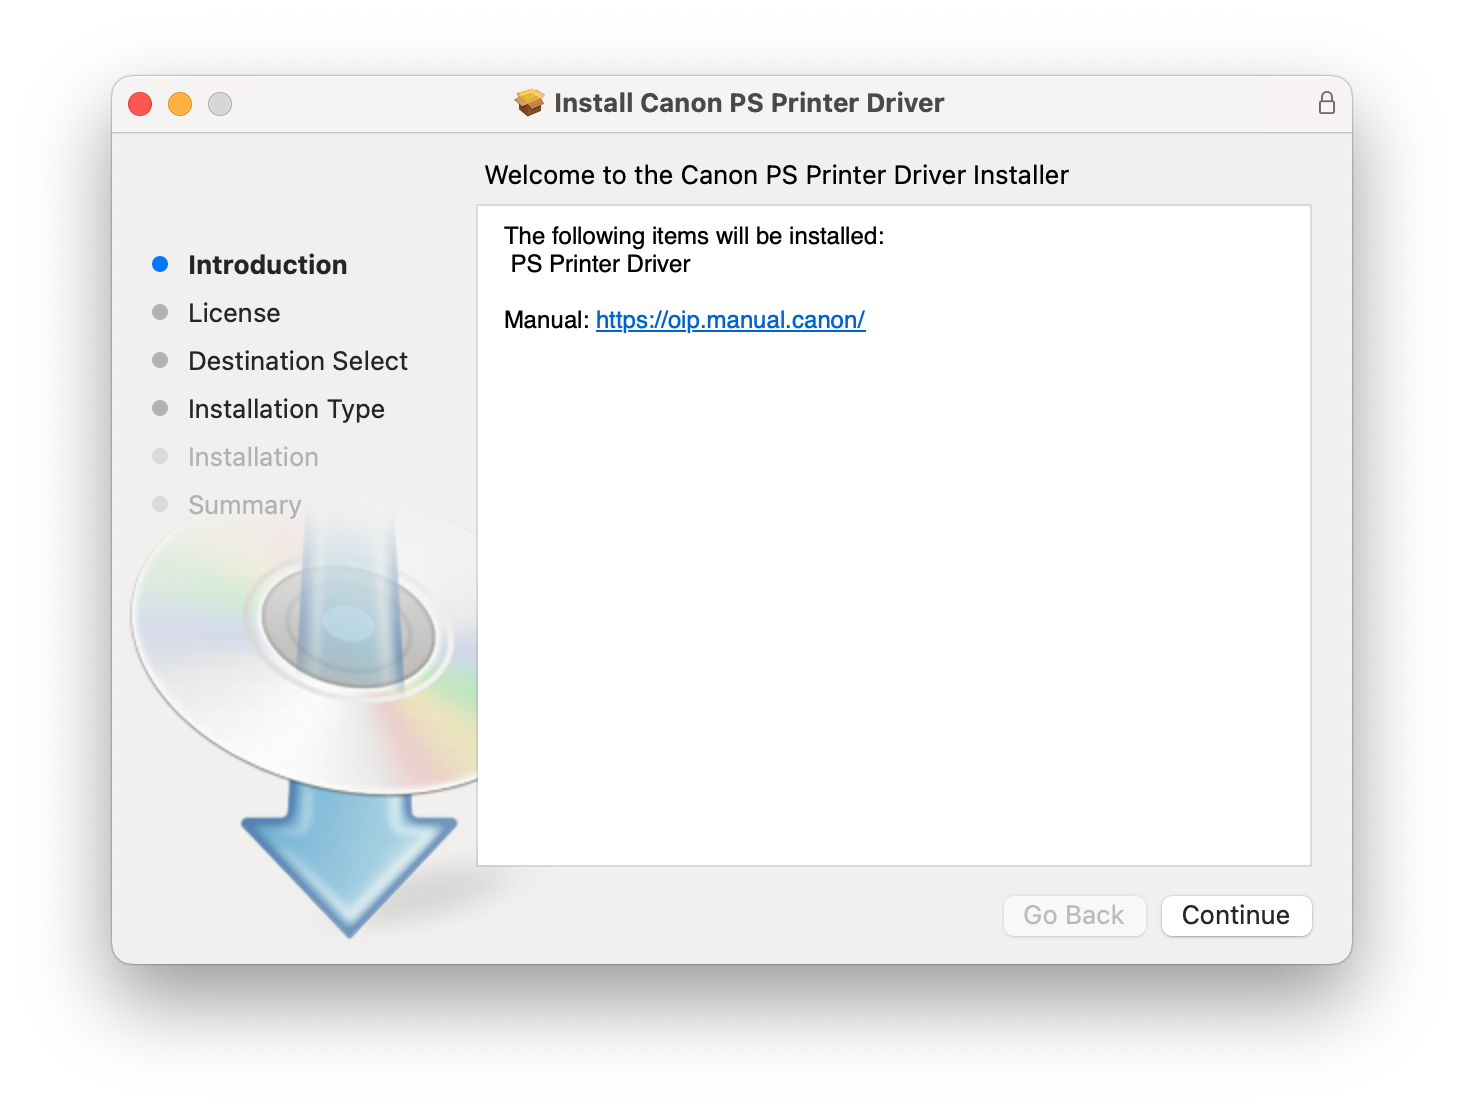
- After the file has finished downloading, open the dmg file by double-clicking on it. A new window will pop up, run the pkg file.

- Continue and agree to the terms to complete the installation
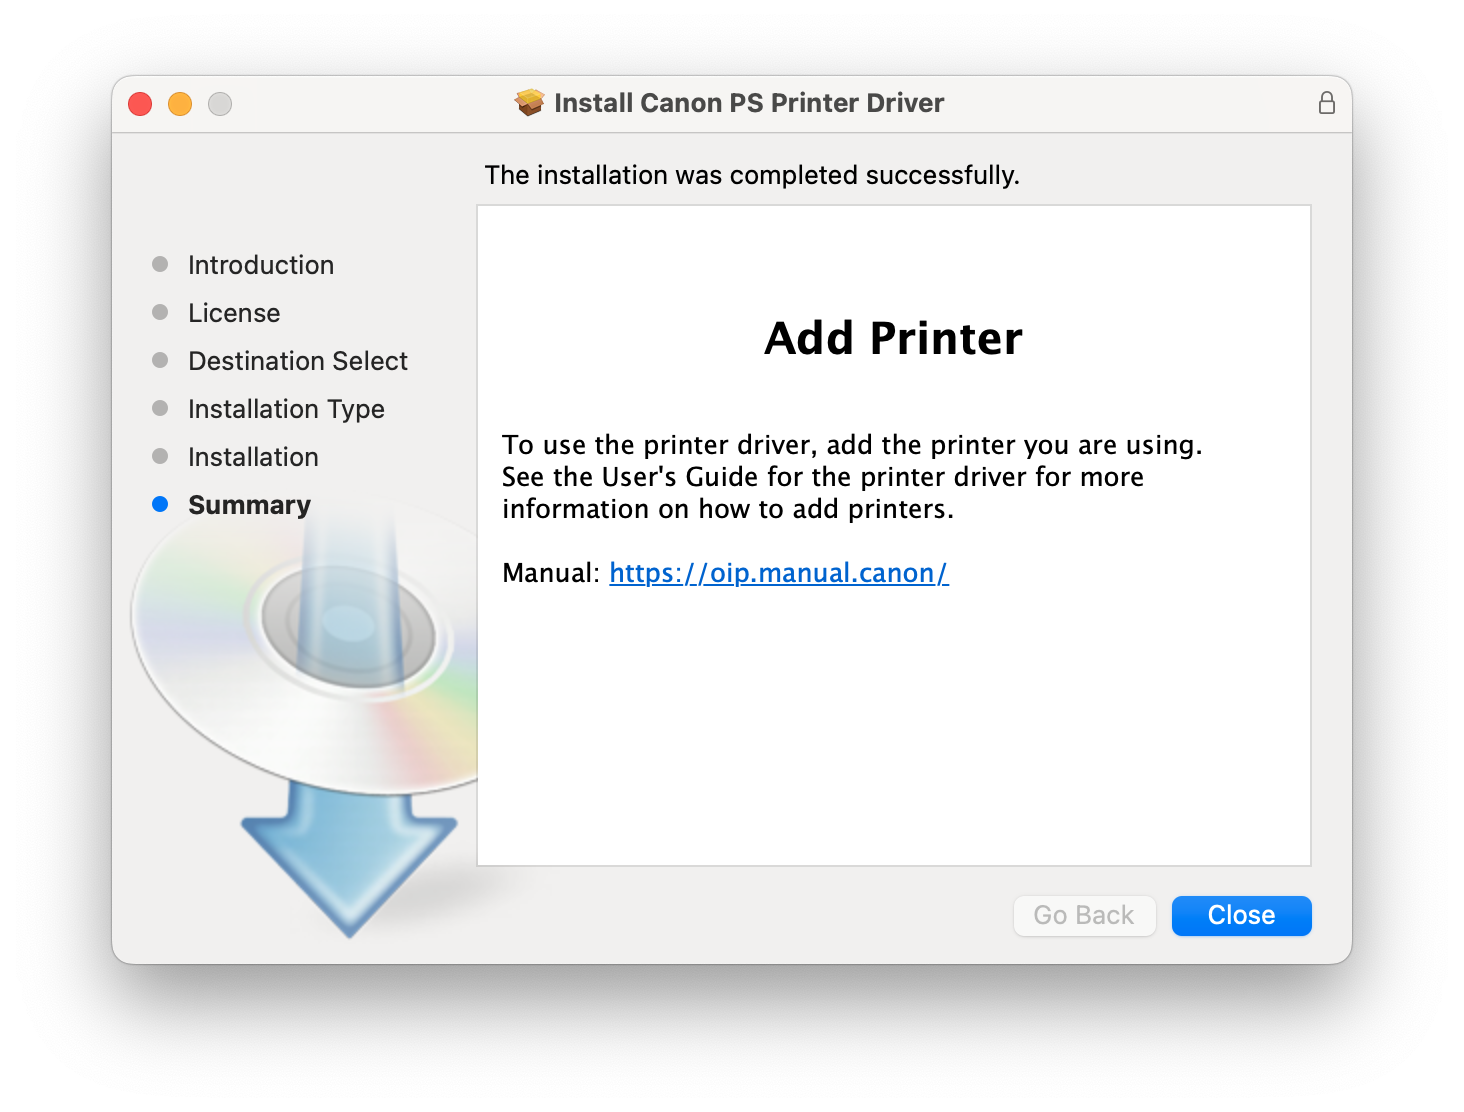
- You should see this window after the installation has been complete.
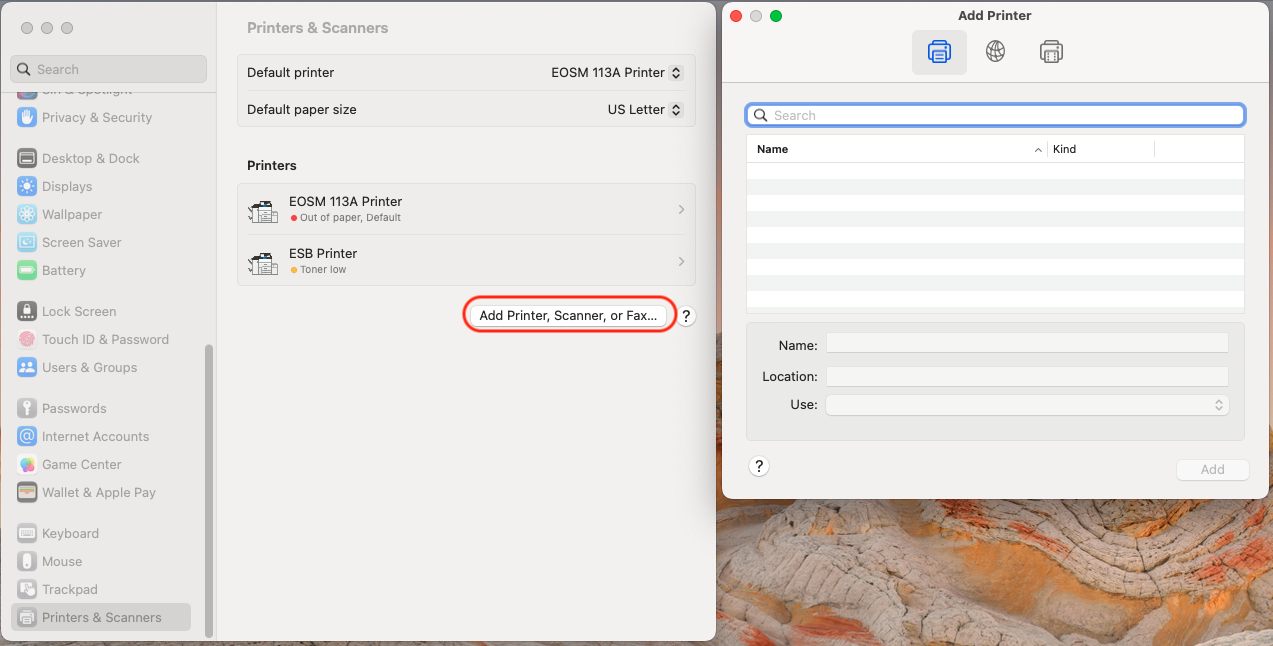
- Click on the Apple icon on the top left of your screen and click on 'System Settings'. Find the printer settings, this may be labeled differently depending on your macOS version.
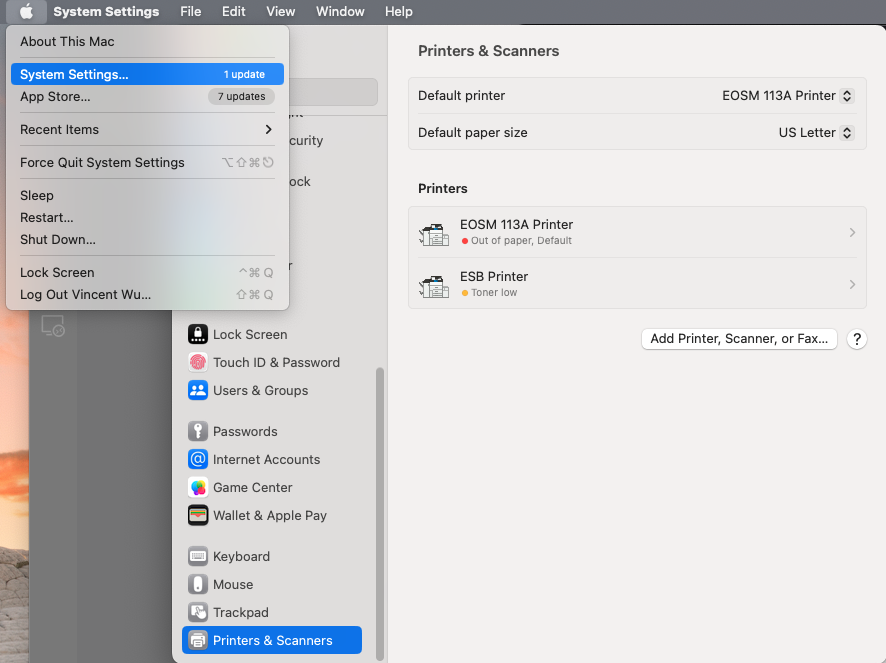
- Click on 'Add Printer, Scanner, or Fax'. A new window should appear, as shown on the right below.
- Click on the globe icon on the top center. Enter the IP address of the printer:
137.82.107.118and select Line Printer Daemon in the Protocol dropdown list.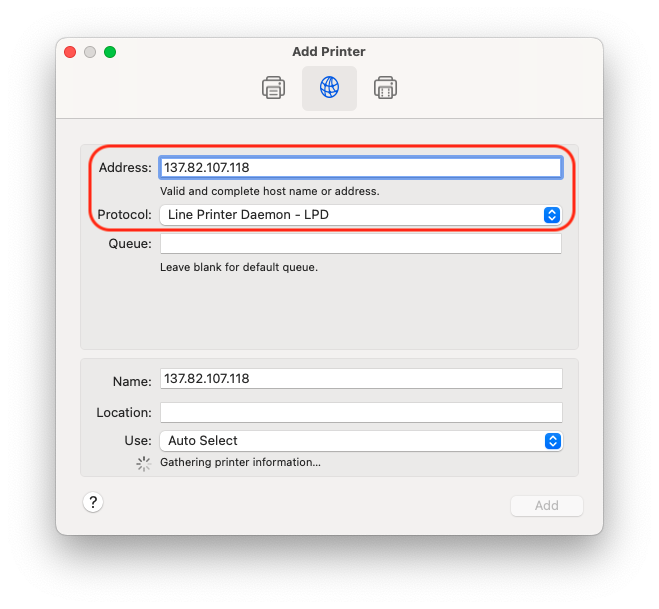
- Rename the printer to MDRU Printer or something memorable. Under the 'Use' dropdown list, click on 'Select Software'. In the new window, enter
2230in the filter box and select 1st option from the list, then click 'OK'. Now, click 'Add' on the main window.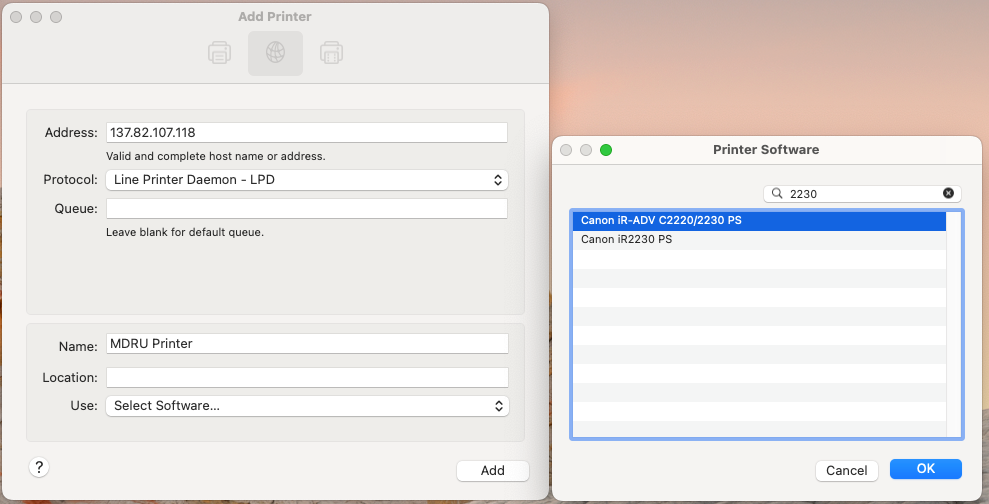
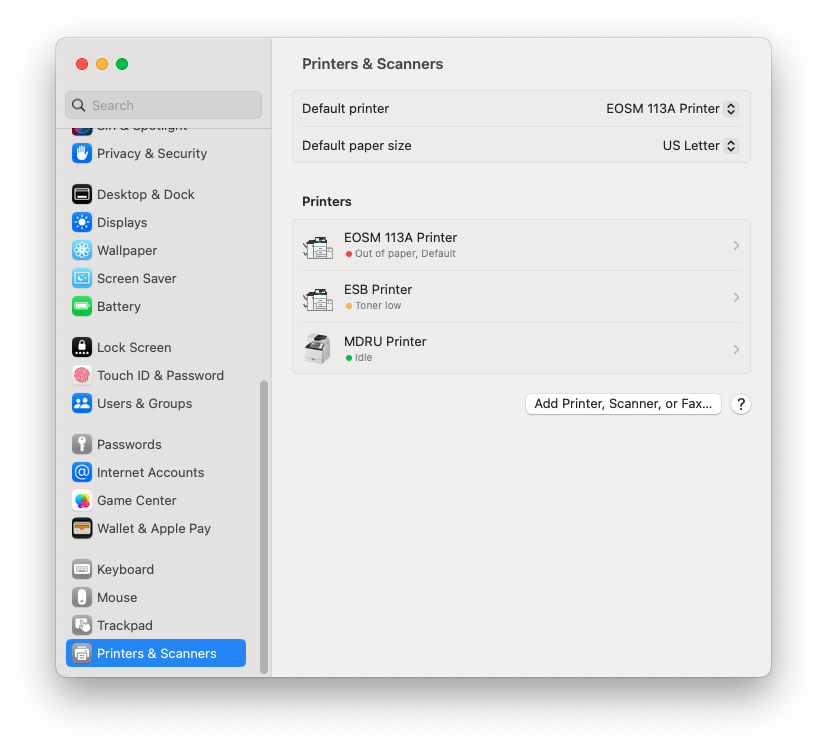
- Now, click on 'MDRU Printer' or the printer you have named.
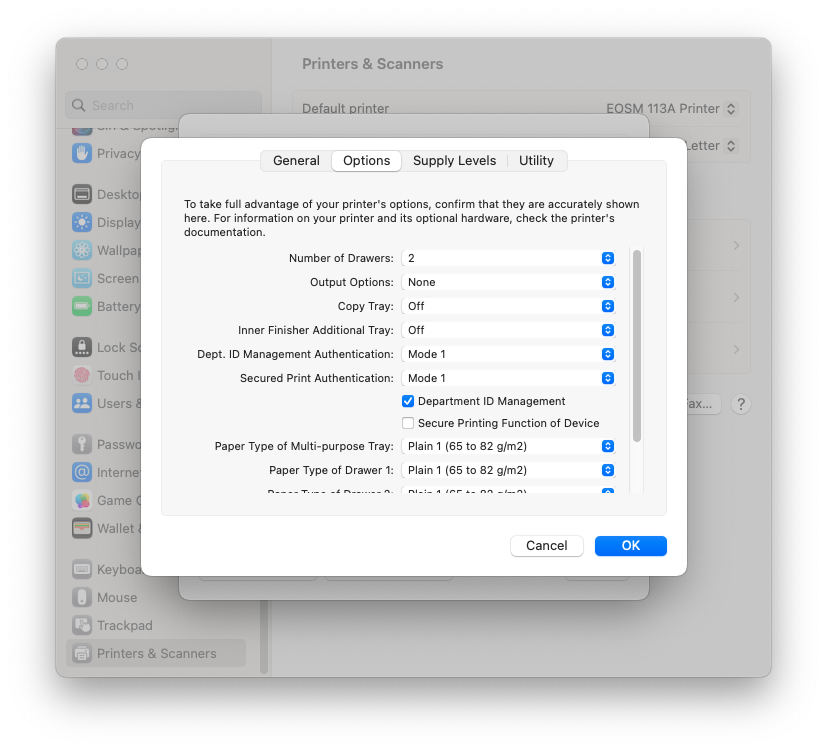
- Click on 'Options & Supplies'

- Click on the Options tab and check 'Department ID Management'
- Click on the 'Utility' tab then the 'Open Printer Utility' button.

- Check 'Use Department ID Management' and enter your Department ID and PIN, then click 'Save Settings'.
You can verify if your credentials are valid by clicking the 'Printer Information' button then click 'OK' when a new window pops up. The 'Verify' button should now be accessible.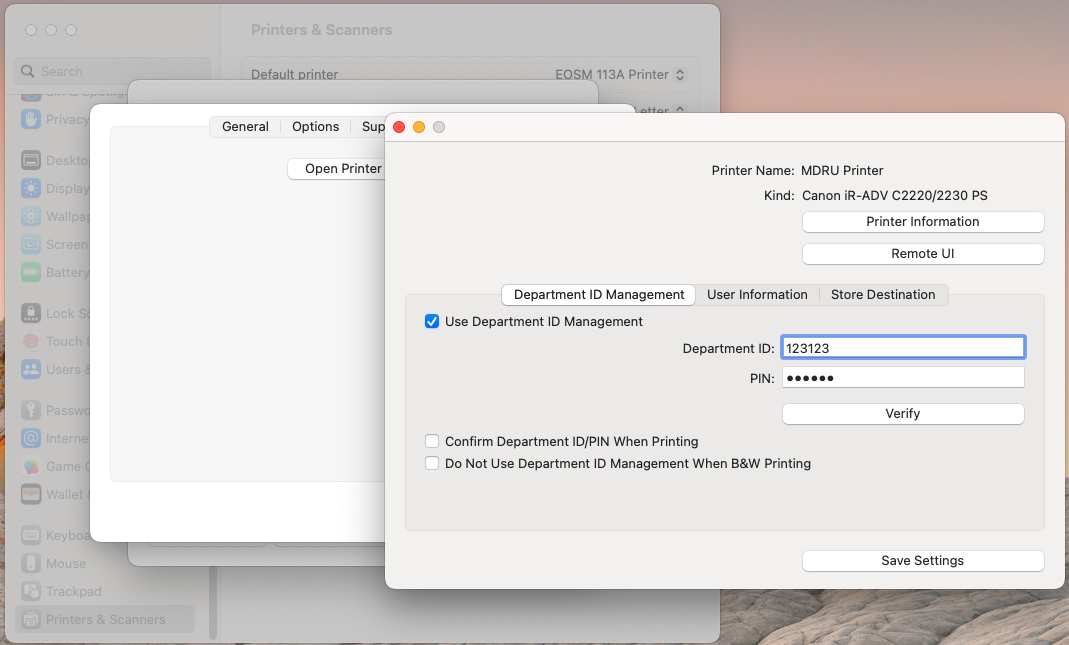
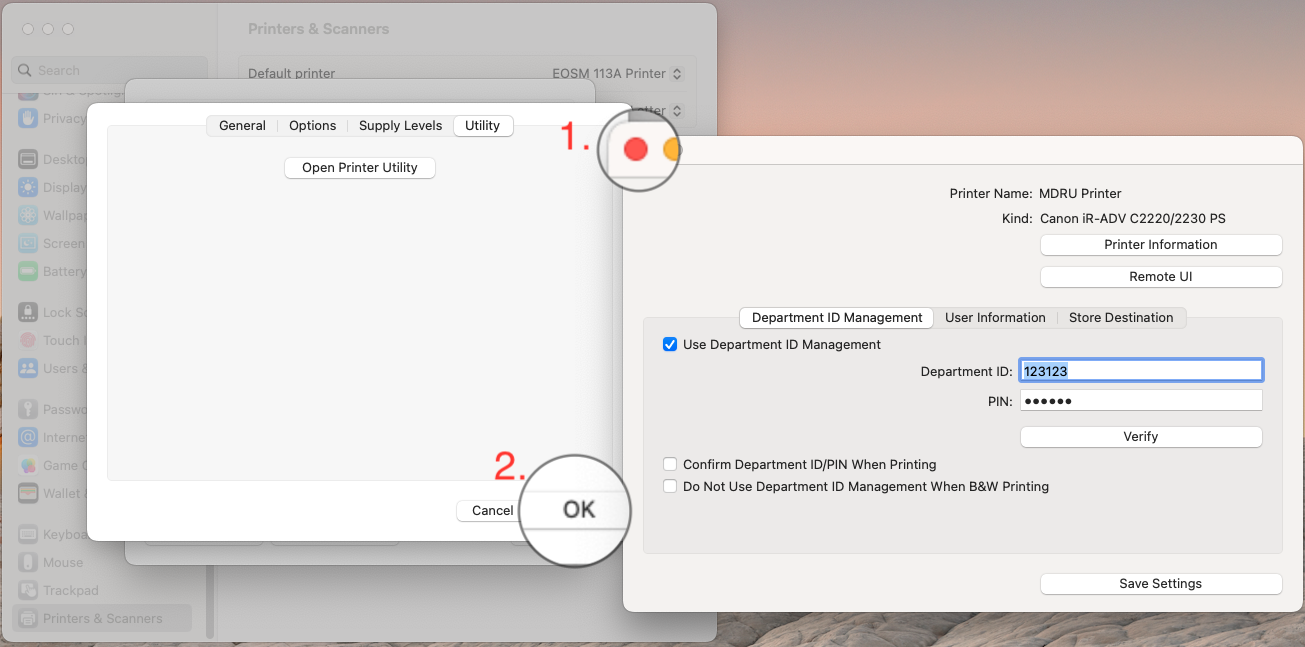
- After clicking 'Save Settings', close the Printer Utility window and press 'OK'.
- You are now ready to print!
For macOS: How to Print from the MDRU Printer - Knowledgebase / Print - EOAS Help Desk
For macOS: How to Print from the MDRU Printer
Authors list
- Last updated: May 10, 2023 by Vincent Wu